AFO 126 - Print shelfmark labels
AFO 131 handles the printing of call number labels. With this AFO you can also define the print formats with which to do your printing.
You can print data on labels using:
· A general (‘standard') layout.
· The pattern recognition mechanism.
· Specific input of data to be printed.
You can select the shelfmarks to be printed by:
|
date |
The system prints a label for all copies (shelfmarks) entered within the specified period |
|
with object barcodes |
A label is printed for all copies or barcodes entered or imported. |
|
via shelfmarks |
A label is printed for the shelfmarks you enter. |
|
file |
A label is printed for all copies included in a special file. |
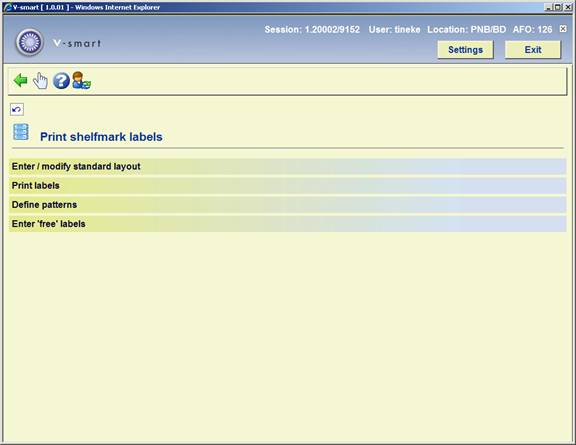
After choosing AFO 126 a menu will be displayed:
The menu options are described separately in the next sections.
Printing according to the general layout means that all print formats are printed in the same manner. In addition to the general ('permanent') layout, you can also define different temporary formats. Typical data that must be defined includes:
· Label dimensions.
· Delimiters that must be used to allocate the shelfmark data to be printed over the different label lines.
After choosing this option the following form will be displayed:

Label width in No. positions: Enter the label width.
Number of positions between labels: Enter the number of positions (spaces) to be inserted between each label. Of course, this is only relevant if you are printing on forms with two or more labels alongside each other.
No. labels per page width: Enter the number of labels that can appear next to each other on the page. The minimum value is "1".
No. lines per label: Enter in how long each label is (number of lines).
No. lines between labels: Enter the number of positions (blank lines)that must be left above or below each label.
No. labels per page length: Enter the number of labels that can underneath each other on the page.
Positioning (for patterns): If you use the pattern recognition mechanism in your printing, you can justify the data in three ways. Specify this by entering one of the following digits:
|
1 |
Left justified |
|
2 |
Right justified |
|
3 |
Centre |
Include sublocation: to specify whether or not the sublocation must be included in the shelfmark.
Include shelfmark prefix: to specify whether or not the shelfmark prefix must be included in the shelfmark.
Include shelfmark suffix: to specify whether or not the shelfmark suffix must be included in the shelfmark.
Include copy number: to specify whether or not the copy number must be included in the shelfmark.
No. of lines for top margin: to specify the top margin for the page.
No. of lines for bottom margin: to specify the bottom margin for the page.
Print the description of the sublocation and wrap text: When this option is ON, the wording rather than the code of a sublocation is printed. If the wording is longer than the width of the label and the wrap text is ON, the remaining text will be on the next line.
With the parameter off (by default)
we see the code for REF sublocation:
REF
With the parameter ON we see the default wording for the sublocation code instead, where the sublocation is expanded in the wording:
Reference
If the wording is longer than the width of the label and the wrap text is ON, we see this same label as (35 positions):
Reference Material (back office
only)
Delimiter groups (1st, 2nd en 3rd): You can specify three groups of delimiters. During printing, the system will split up the label based on the characters that are part of a delimiter group.
Example:
You print labels for the call number: "955-55/AC"
You define the following delimiters:
1st group: "-" (minus sign)
2nd group: "/" (forward slash)
3rd group: no delimiters
The system will print the label as follows:
955
55
AC
Print delimiters: Here you specify for each group of delimiters whether the delimiter must be printed or not.
Note:
The layout you define is location-specific and thus applies to all the labels printed at your location. Of course, this means that a layout must be defined for each location at which labels are to be printed.
After choosing this option the following form will be displayed:
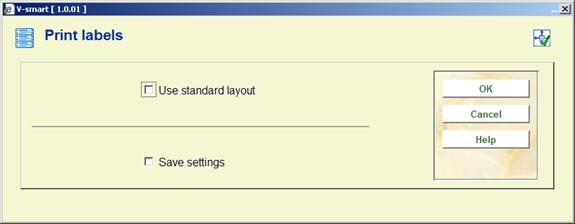
Use standard layout: Here you specify whether you wish to use the standard layout. If you do not want to use the standard layout, you must first define a temporary modification.
Note:
The system does not save this new layout. The temporary layout is only valid for the print task you start by selecting the menu option 'Print labels' immediately after defining the temporary layout.
When you do not check this field you will first be prompted to enter a definition (see above). When you do check the field (or after entering a temporary definition), the next input screen appears:

Activate pattern recognition: Specify whether pattern recognition must be activated. This means that you can define a specific layout per pattern, which will be used for all call numbers that correspond to the pattern specified.
If you select pattern recognition, the system will attempt to find a layout for every label to be printed based on the pattern you have defined. For labels for which no layout (pattern) has yet been defined, the system will request that you define a layout before printing begins.
Selection method: Specify the manner in which the labels must be selected. The options are:
· By date: the system requests you to specify a start and end date. Enter two dates in the format dd/mm/yy (for example "29/03/92"). If you specify a period for which no objects have been entered, the system returns the message "No objects entered in this period". The system will print the call numbers for all copies entered within the period you specify.
· By object: you select the call numbers to be printed by reading in barcodes or by entering item numbers.
· By call number: the system requests one or more call number(s). You specify the call numbers to be printed yourself.
· Per file: [This option is for future use]
After you have made your selection, an input screen appears in which you must enter the number of labels to be printed for each call number. The system then switches to the standard output procedure.
The system allows you to define a layout for the different patterns used in your library, which the system then uses to print the data in the manner you desire.
A pattern is considered to be each unique digit/letter combination of the same length. A few examples should help clarify this:
Example:
Of the shelfmarks:
(a) germ 855.6
(b) engl 855.7
(c) fren 395.5
(d) germ 855.55
a), (b) and (c) have the same pattern, i.e. '4 alpha 1 blank 3 digits 1 period 1 digit'; (d) however, does not fit this pattern because it ends with 2 digits
Of the shelfmarks:
(e) az.o 999
(f) az.w 955
(g) az-w 955
(e) and (f) have the same pattern, i.e. '2 alpha 1 period 1 alpha 3 digits'; (g) however, does not have this pattern because the call number contains a hyphen in the third position rather than a period.
If you select this menu option an input screen appears. If patterns have already been entered, an overview screen appears with all the patterns that have been defined.

Pattern: Enter a sample call number here - for example, 'abcd123.4'
Once you have entered the data, an input screen appears:

Label line (no): Enter here per label line what part of the pattern should be printed. Take the data from the general layout. Do not fill in lines that should remain blank. Use the <TAB> key to skip to a new input line.
After you have entered data for each line, the system shows the data entered in a frame which has the same dimensions as the label, so that you can see whether you have entered the data correctly. If not, you can redefine the data.
After confirmation, a survey appears with the patterns defined:
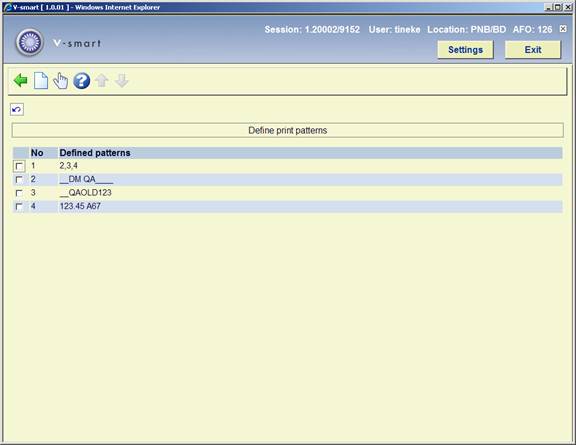
Select the pattern whose layout you wish to modify.
Indicate per label line what is to be printed. You do not have to fill in every input field. Use the <Tab> key to move to a new input line.
After you have entered the data for each line, the system displays the data entered in a frame which is the same dimensions as the label so that you can see whether the data you entered is correct. If not, you the re-define the data.
Free labels allows you to literally specify the text that must be printed.
If you select this menu option, an input screen appears:
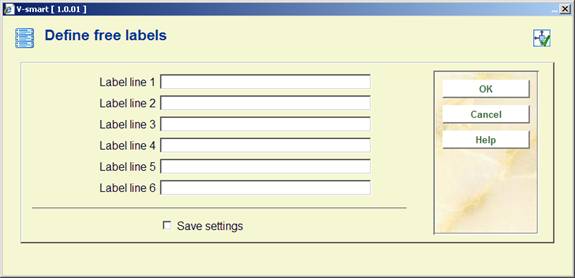
Label line (no): Enter what must appear on the label per line. After you have entered all the desired data, the system asks how many labels you wish to print. The system uses the defined standard layout, and asks you to define the data for the number of lines per label that must be included for that layout. Enter the data to be printed per line. The maximum length of the data is determined by the number of characters per line specified in the standard layout. You may leave fields empty.
· Document control - Change History
|
Version |
Date |
Change description |
Author |
||
|
1.0 |
April 2008 |
creation |
|
||
|
2.0 |
March 2010 |
new options; general overhaul |
|
||